Plinqx Design Studio
Available: Base
Overview
Plinqx Design Studio lets you design, test, and save JSON-to-JSON transformations using a visual designer. A typical use case is taking a Salesforce record (source JSON) and transforming it into a target system payload (destination JSON).
Design Studio supports:
- Generating Source JSON from a Salesforce SOQL query
- Defining a Destination JSON template
- Visually mapping fields between source and destination
- Applying transformation logic using Fixed Value, Formula, Flow, or Apex
- Testing the transformation with sample JSON and viewing the transformed output
- Saving transformations as reusable Mappings
Key concepts
Transformations
A Transformation is the overall mapping definition that connects a source payload to a destination payload.
On the left panel you can:
- Browse existing transformations
- Refresh the list
- Create a new transformation
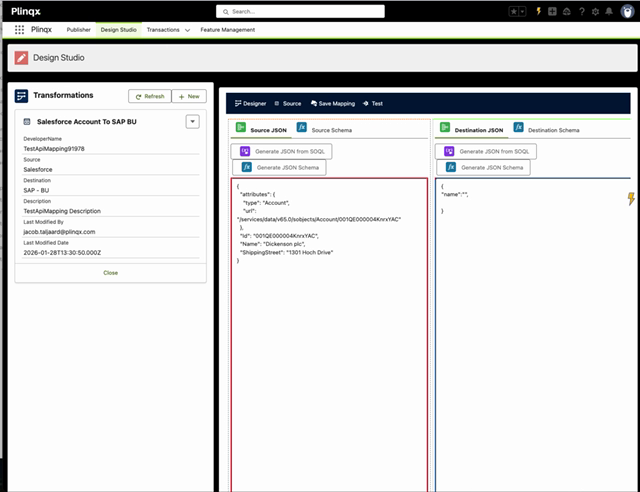
Source JSON and Destination JSON
- Source JSON: The input payload (often generated from Salesforce data).
- Destination JSON: The output payload template (your target structure).
You can maintain both JSON and their generated schemas in the Source tab.

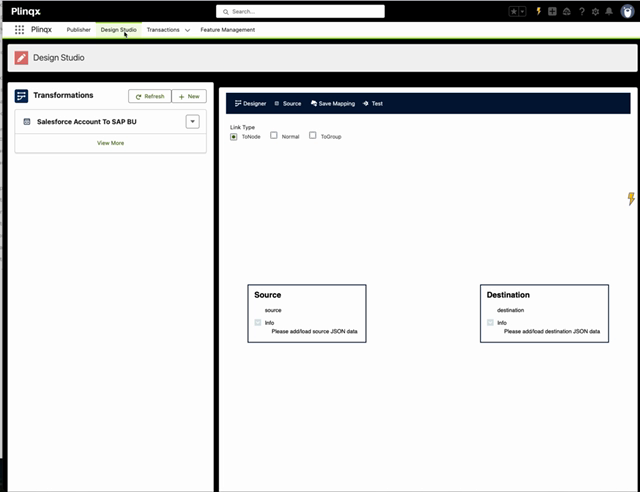
Navigation
- In Plinqx, open Design Studio from the top navigation.
- Select a transformation in the left panel, or click + New to create one.
- Use the tabs across the top of the workspace:
- Designer: Visual mapping canvas
- Source: Source/Destination JSON + schema
- Save Mapping: Save mapping metadata and publish the mapping
- Test: Run a transformation preview
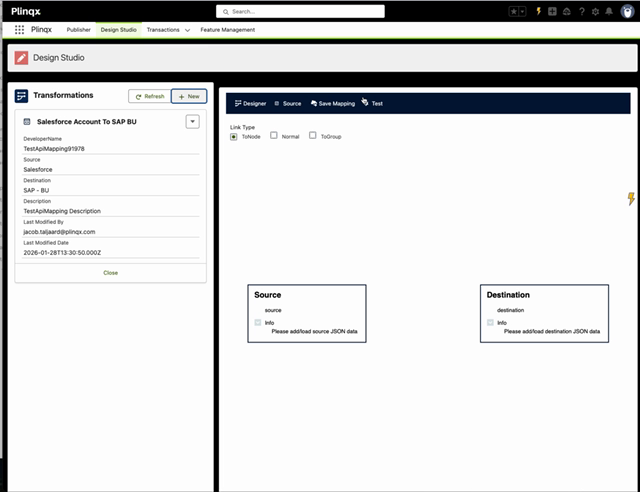
Create or update a transformation
Step 1 - Select (or create) a transformation
- In the left panel, choose an existing transformation.
- (Optional) Click + New to create a new transformation.
Tip (Admins/Configurators): Use meaningful names and descriptions. These show up to other users when selecting mappings.
Define the Source JSON
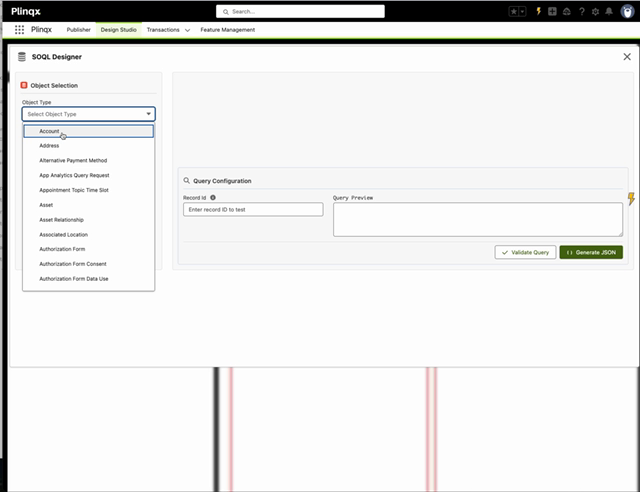
Option A - Generate Source JSON from SOQL
- Open the Source tab.
- In Source JSON, click Generate JSON from SOQL.
- In the SOQL Designer:
- Select an Object Type (e.g.,
Account) - Select fields to include
- Review the query preview
- Select an Object Type (e.g.,
- Click Validate Query (recommended).
- Click Generate JSON.
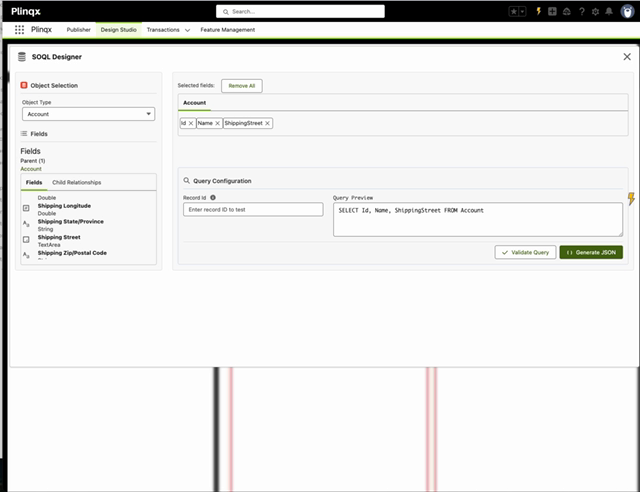
After generation, the Source JSON panel is populated.
Option B - Paste Source JSON
You can paste your own JSON into Source JSON if your payload is coming from another system.
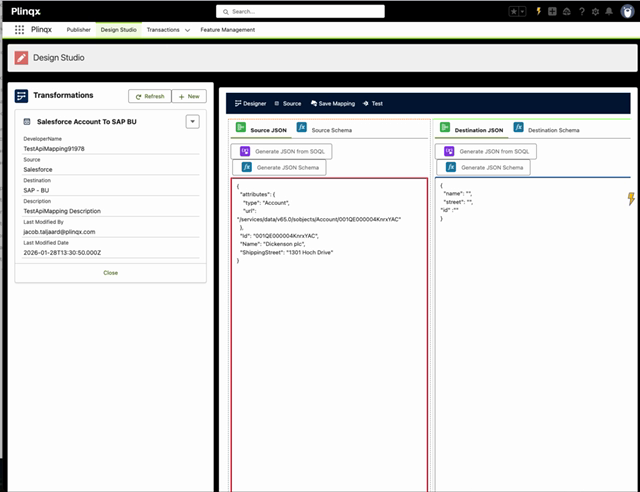
Define the Destination JSON
- Still in the Source tab, locate Destination JSON.
- Paste or type a JSON structure that represents your target payload.
- Start with a minimal template if needed
- Add keys for the fields you intend to map
Best practice (Configurators):
- Keep destination keys consistent with the target API contract.
- Prefer a stable destination structure; adjust mappings rather than constantly reshaping the output.
Design field mappings
Step 1 - Open the visual designer
- Open the Designer tab.
- Confirm your Source and Destination blocks are present on the canvas.
Step 2 - Choose a link type
At the top of the designer you can select a Link Type (for example: ToNode, Normal, ToGroup). Use the option appropriate for how your mapping should connect nodes (single field mapping vs grouped mapping).
If you are unsure, start with Normal for standard field-to-field mapping.
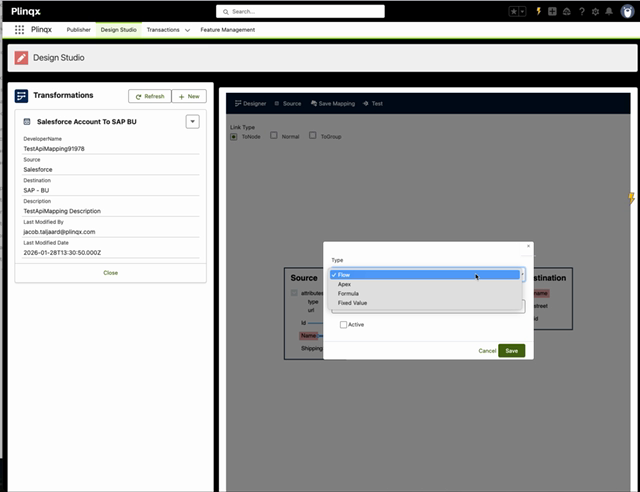
Step 3 - Configure mapping logic for a destination field
When you configure a mapping rule (e.g., by clicking a destination node/field), you can choose the rule Type:
- Fixed Value: Output a constant value
- Formula: Calculate a value using the formula builder
- Flow: Delegate logic to a Salesforce Flow (invoked by Plinqx)
- Apex: Delegate logic to an Apex class/method (for advanced cases)
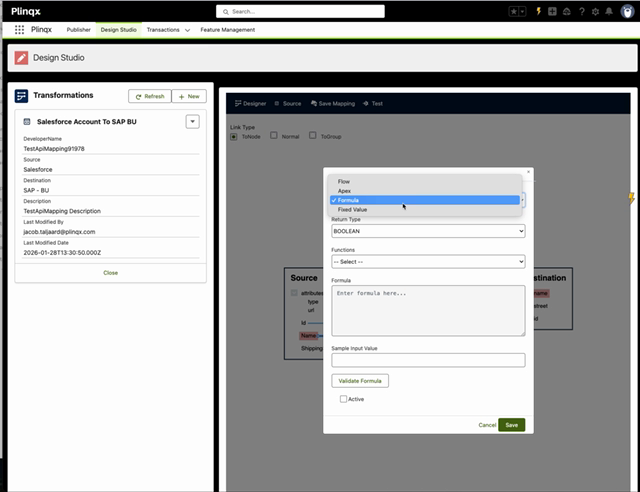
Formula mapping rules
When Type = Formula, you can:
- Select a Return Type
- Pick a function from the Functions dropdown
- Build your formula
- Provide a Sample Input Value (optional but helpful)
- Click Validate Formula
- Set Active to enable the rule
- Click Save
Admin/Configurator notes
- Use Formula for simple transformations (string manipulation, conditional logic, formatting).
- Use Flow/Apex when you need:
- Multi-step logic
- External lookups
- Complex conditional routing
- Reusable enterprise logic with governance
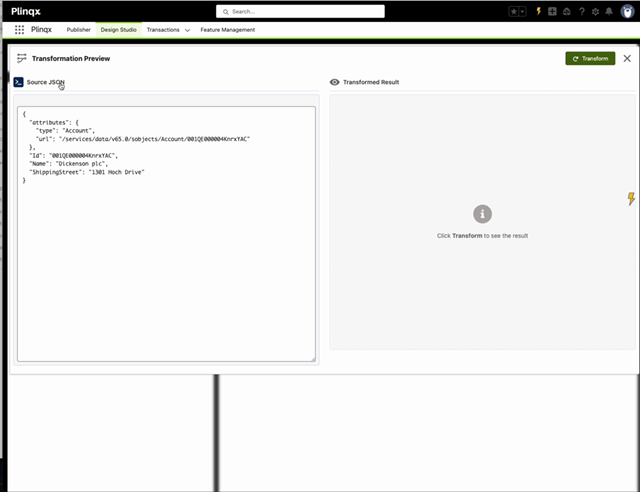
Test the transformation
- Open the Test tab.
- Review the Source JSON (input) on the left.
- Click Transform.
- Review the Transformed Result on the right.
Tip: If the result is empty or missing fields, confirm:
- Destination JSON contains the keys you are mapping to
- Your mapping rules are Active
- Your source JSON contains the fields your rules reference
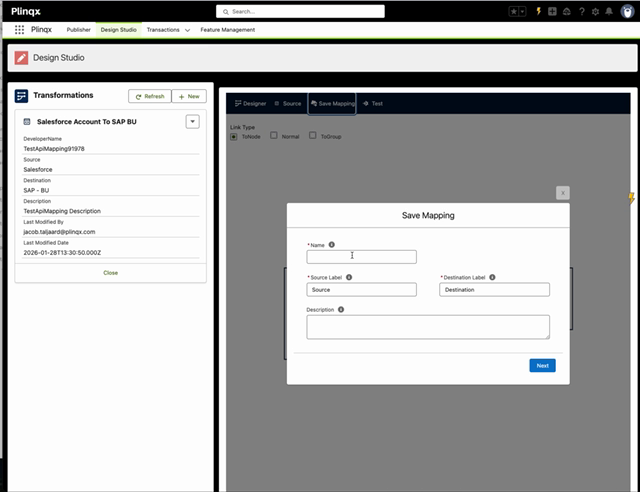
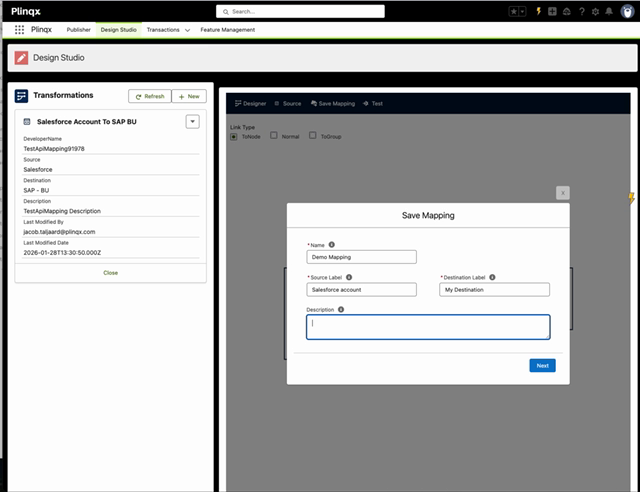
Save and label the mapping
- Open the Save Mapping tab.
- Provide:
- Name (mapping name)
- Source Label (friendly label shown to users)
- Destination Label (friendly label shown to users)
- Description
- Click Next to proceed through the save flow.
Best practice (Admins/Configurators):
- Use consistent naming conventions (e.g.,
Salesforce Account -> SAP BU (v1)). - Put key assumptions in the description (required fields, constraints, intended use).
Troubleshooting
"Invalid JSON" or blank schema
- Ensure your JSON is valid (matching braces/quotes).
- Regenerate schema if the JSON structure changed.
Formula won't validate
- Confirm the Return Type matches your output expectations.
- Add a Sample Input Value if the function needs one.
- Simplify and validate incrementally.
Transform returns no output / missing fields
- Confirm mappings are saved and rules are Active.
- Ensure destination keys exist in Destination JSON.
- Verify the source JSON includes the expected fields.
Glossary
- Transformation: A configured mapping between source and destination payloads.
- Mapping Rule: The logic used to populate a destination field.
- Schema: A structural definition of the JSON (used for designer assistance and validation).
- SOQL Designer: Helper tool to generate sample JSON from Salesforce objects using a query.