Navigating Plinqx
Available: Base
This guide describes how to access Plinqx in Salesforce and navigate between the main Plinqx areas typically used during configuration and administration.
Prerequisites
- Plinqx is installed in your Salesforce org.
- Your user has been granted the required Plinqx permission set(s) (for example, Plinqx Administrator).
Accessing Plinqx in Salesforce
Open the Plinqx app
- In Salesforce, open the App Launcher (grid icon).
- Search for Plinqx and select the Plinqx app.
Use Plinqx tabs
Once you’re in the Plinqx app, use the navigation bar tabs to move between Plinqx features ( Publisher, Design Studio, Transactions and Feature Management).

Core navigation areas
The exact tabs you see may vary based on permissions and which Plinqx features are enabled within your subscription.
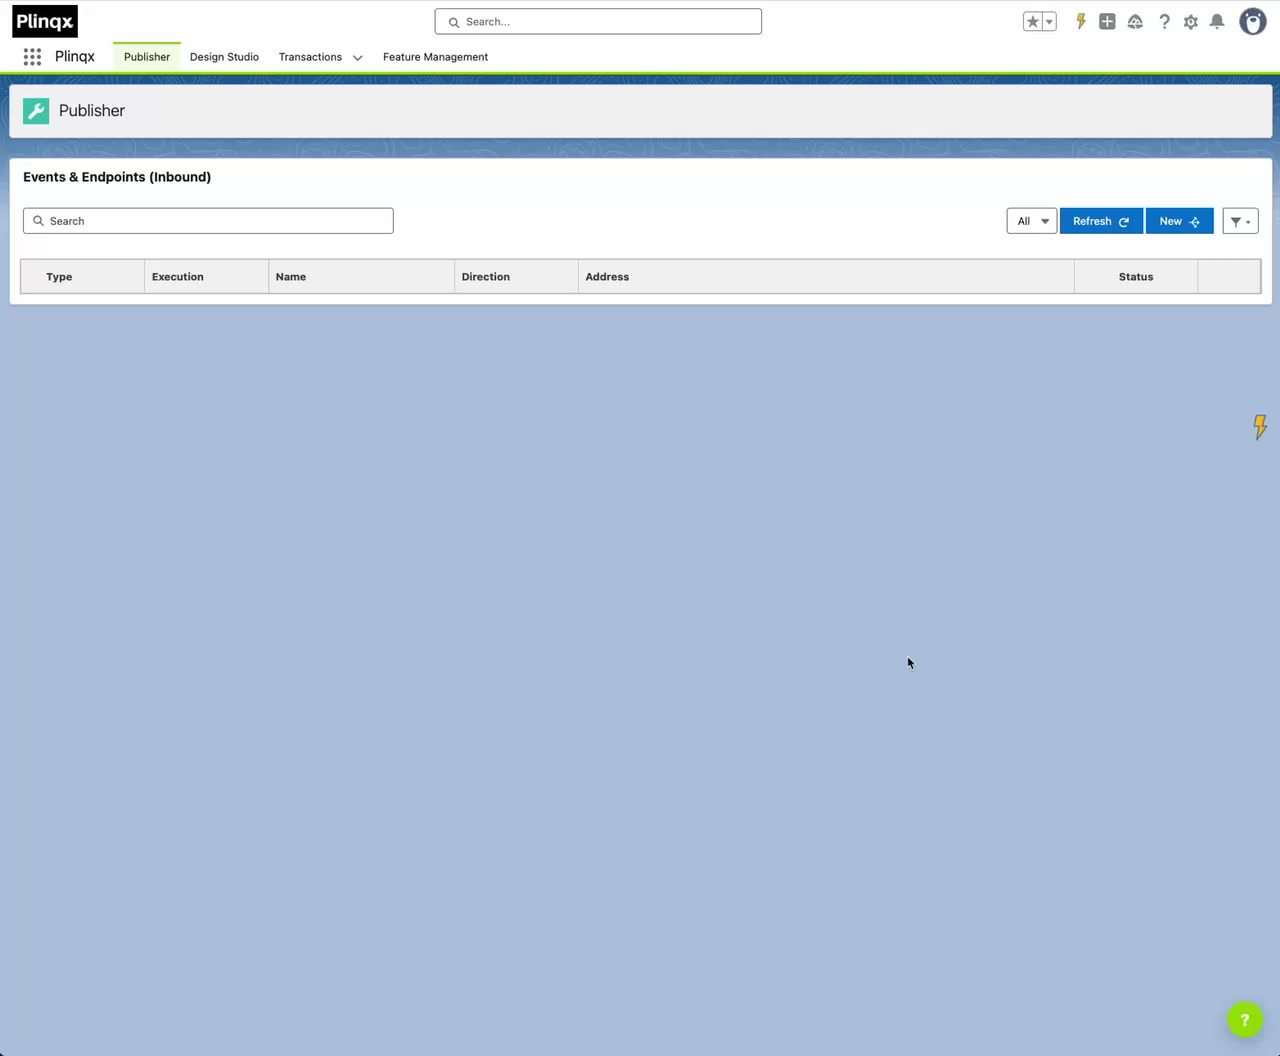
Publisher
Use Publisher to:
- Configure Inbound APIs
- View outbound Flows
- Create Named Credentials
- Create and Remove Custom Permissions
- Configure Webhooks and Keys (This requires the Webhook feature being enabled in your subscription)
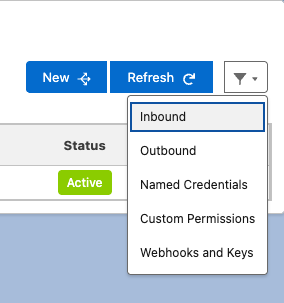
To navigate your view between the available features, use the filter icon located at the top right of the table
Design Studio
Use Design Studio to design, test and deploy JSON-to-JSON transformations using a visual designer.
Transactions
Use Transactions provide an auditable record of API activity processed by Plinqx in Salesforce.
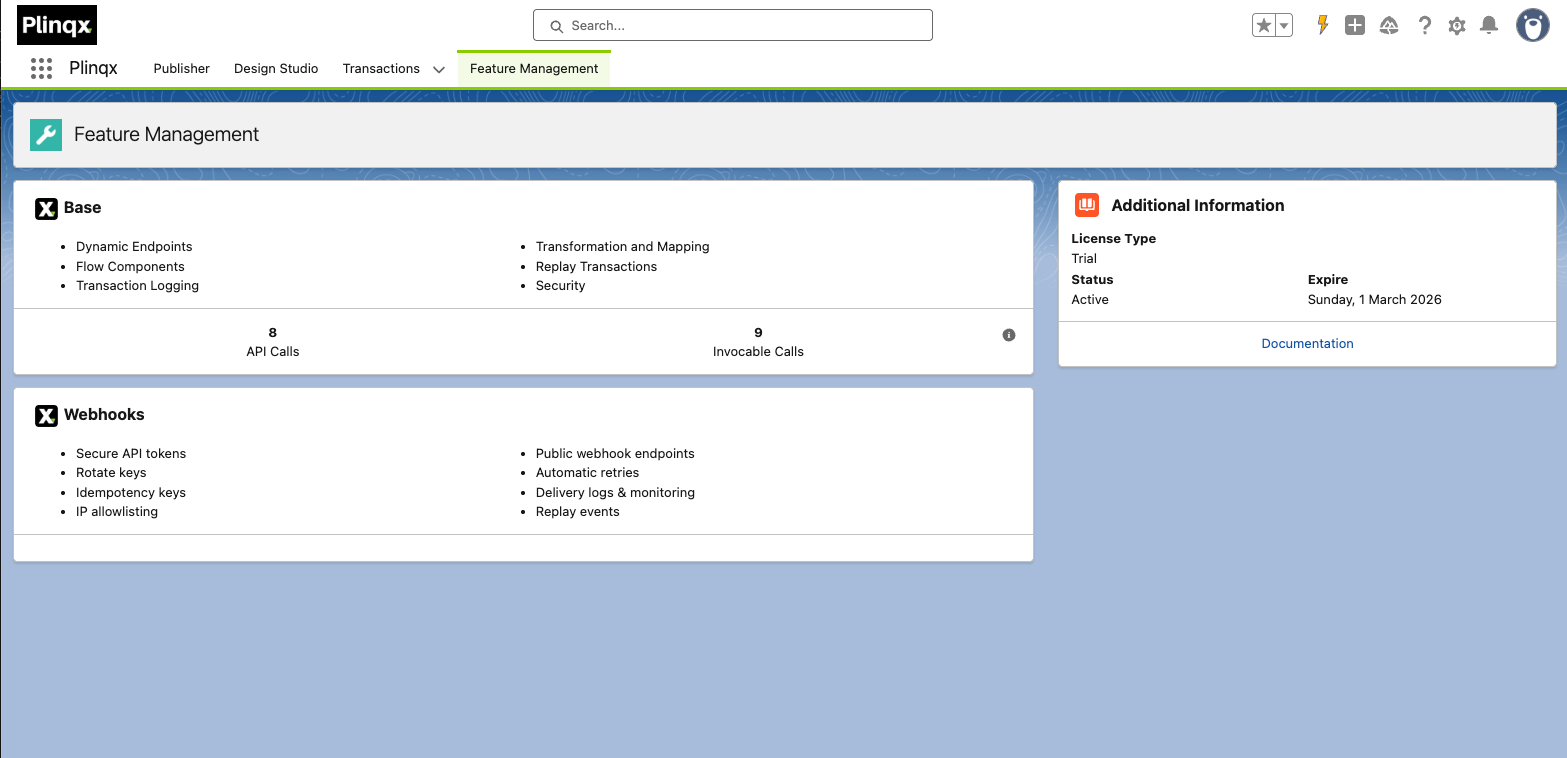
Feature Management
Feature Management provides you with a view of features enabled in your current Plinqx subscription. You will also be able to see your license type as well as when your subscription expires.